How to Sync your TrueNAS to Azure
TrueNAS as your personal storage solution
Previous year I invested in a NAS to store my precious data. TrueNAS uses ZFS te create a resilient backup solution. I have 3 4TB HDD’s in my NAS configured in RaidZ1, preventing data loss if even a whole disk fails. This already sounds a LOT better than just having all the files on one disk. To make sure that my data is safe in case of a bigger disaster, I replicated the most important data to Azure. Fortunately, TrueNAS already has features in place to do just that. As I could’t find a good tutorial on the matter myself, I decided to create one :)
Full Walkthrough
This walkthrough describes the steps to synchronize Datasets from TrueNAS to Azure in a push configuration.
Prerequisites:
- Some sort of system/VM with TrueNAS of FreeNAS (older version) running on it. For the purposes of this video I created a Hyper-V machine on my PC.
- An Azure subscription
- About 10 minutes of your time
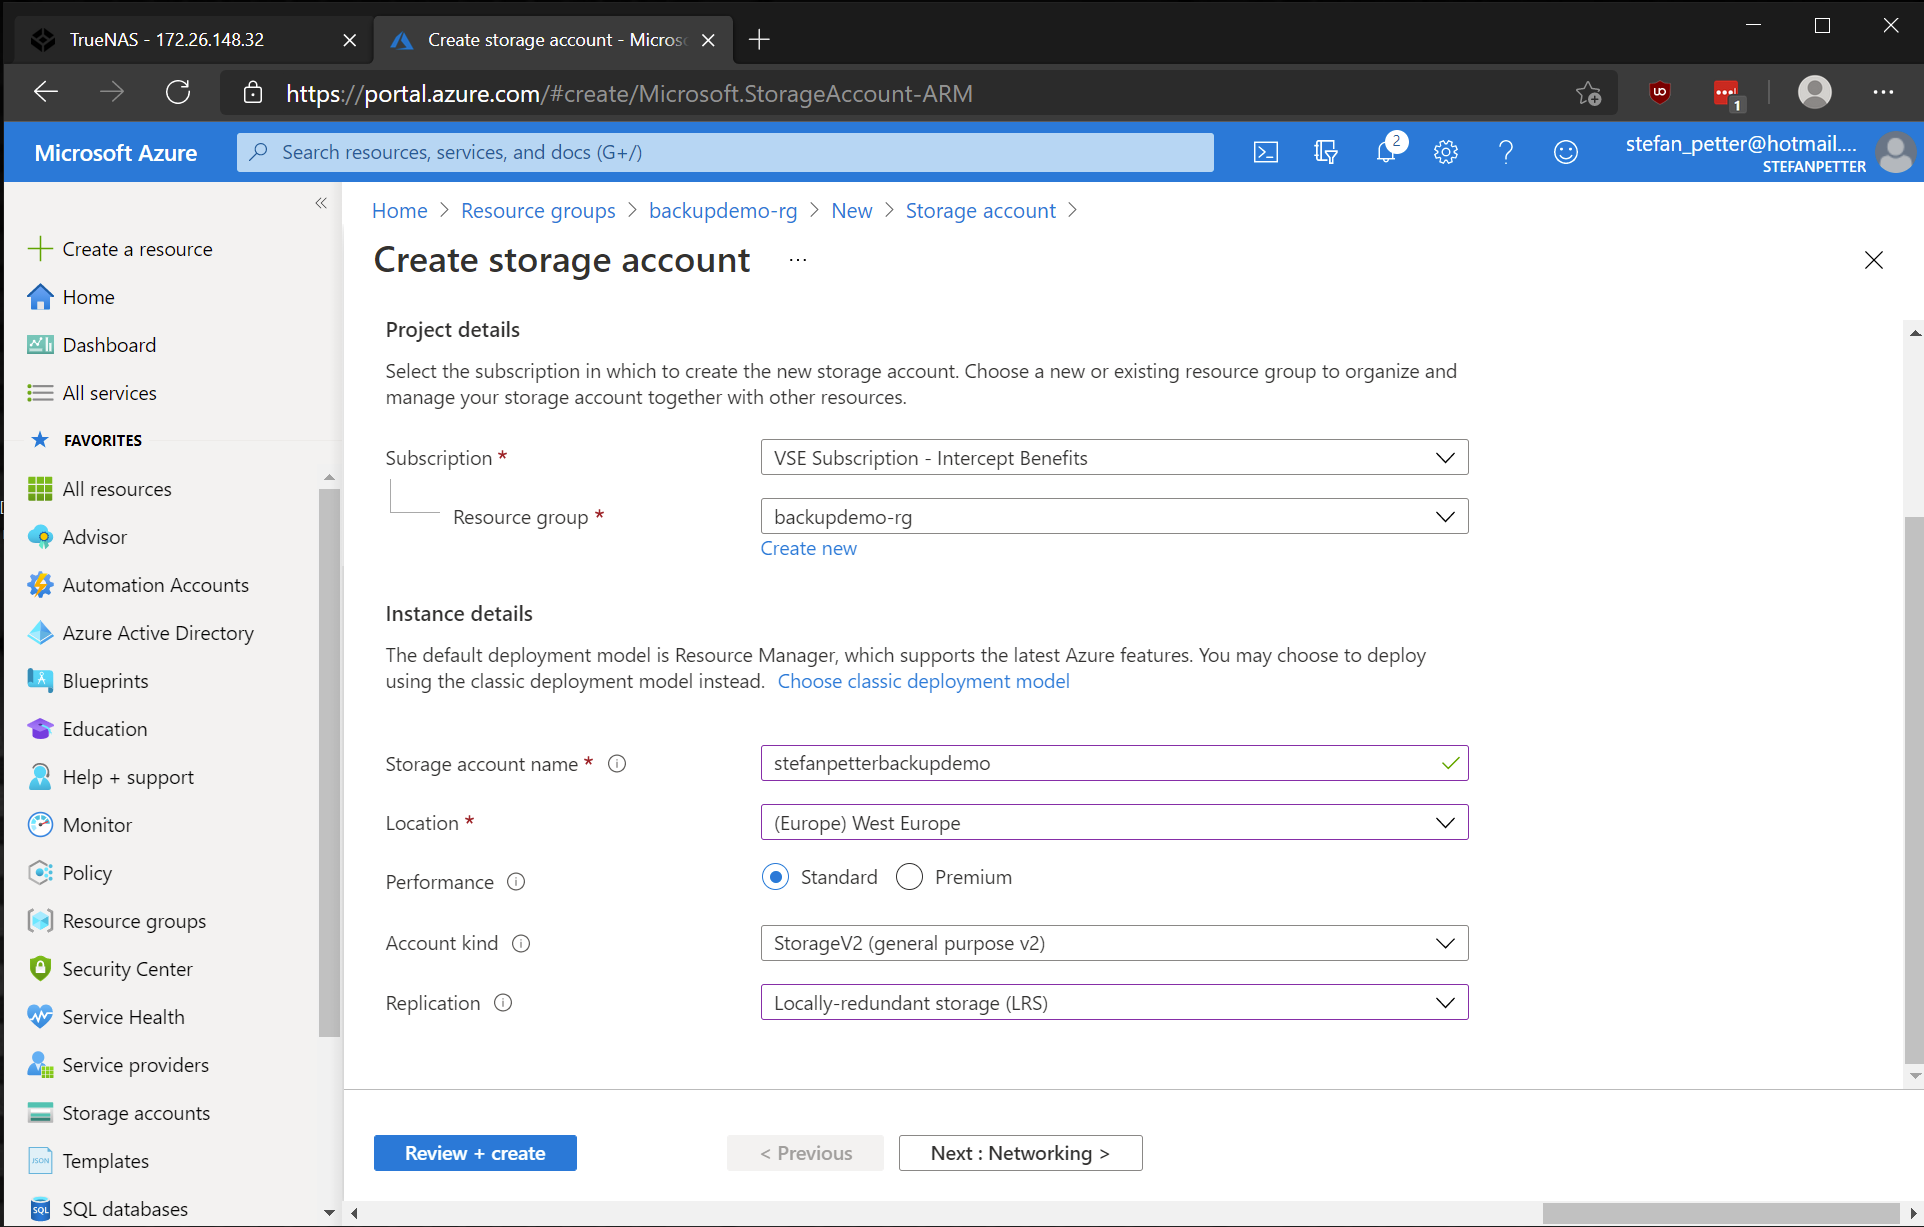
To start off we first need to create a storage account in Azure. As this storage account will be used as cold storage, a standard, locally redundant storage account is sufficient.
The next step is not mandatory for functionality, but I really wanted to include it. By default, your storage account will be accessible from all public networks. As your NAS will most likely reside behind one (your own public) IP address, I’d highly suggest you allowing only access from this IP address. If you go to the network tab, click on “Selected networks”. Below the “Firewall” section, you’ll see an option to “Add your client IP address” to the firewall. The suggested IP address will be your public IP address.

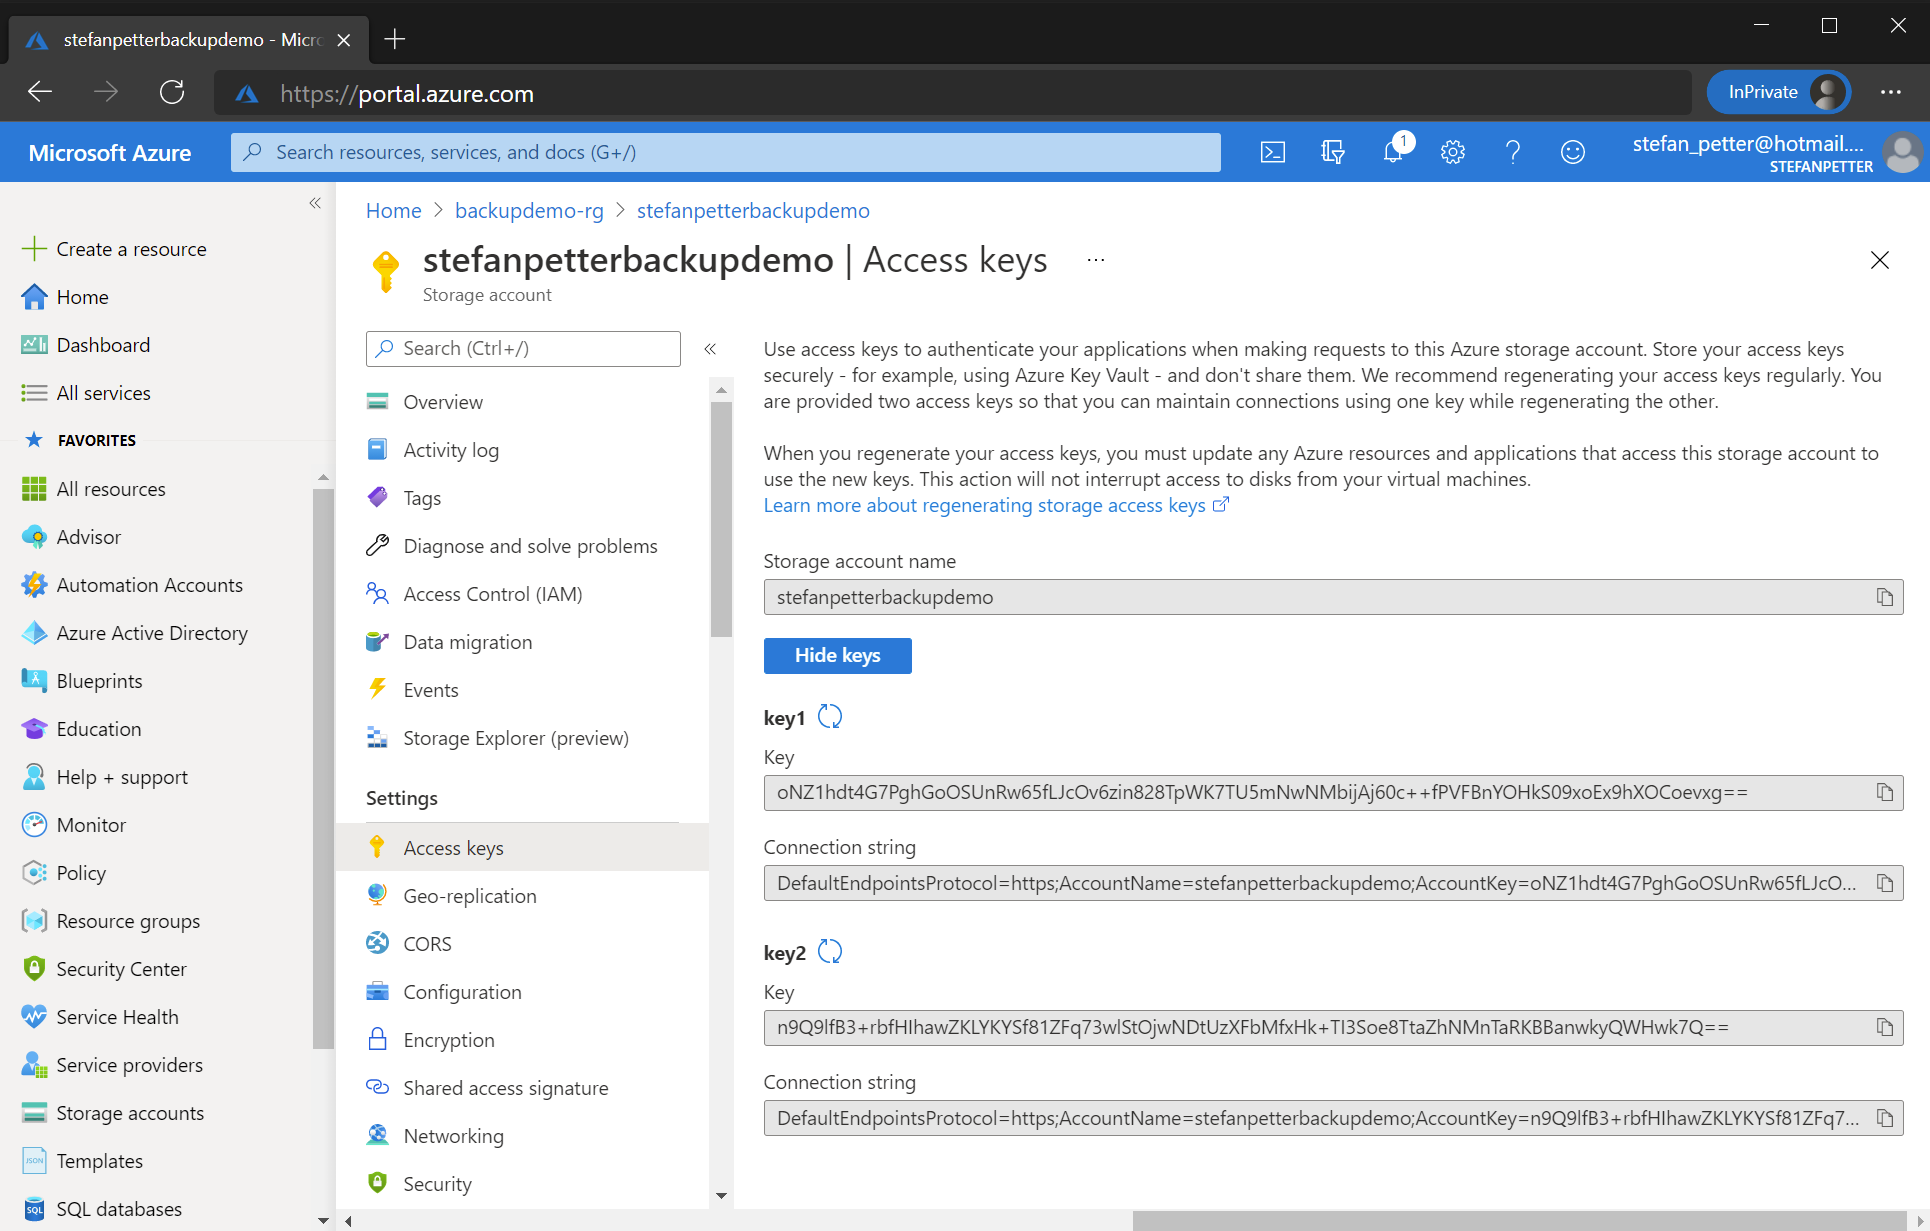
After restricting access, we need to grab the storage account key. Please make sure that you don’t share this key with anyone! The mentioned storage account in this tutorial does not contain any meaningful data and will be deleted before this post will reach your eyes :) The storage account key will be available from the “Access keys” tab. Copy the content from the “Key” field.
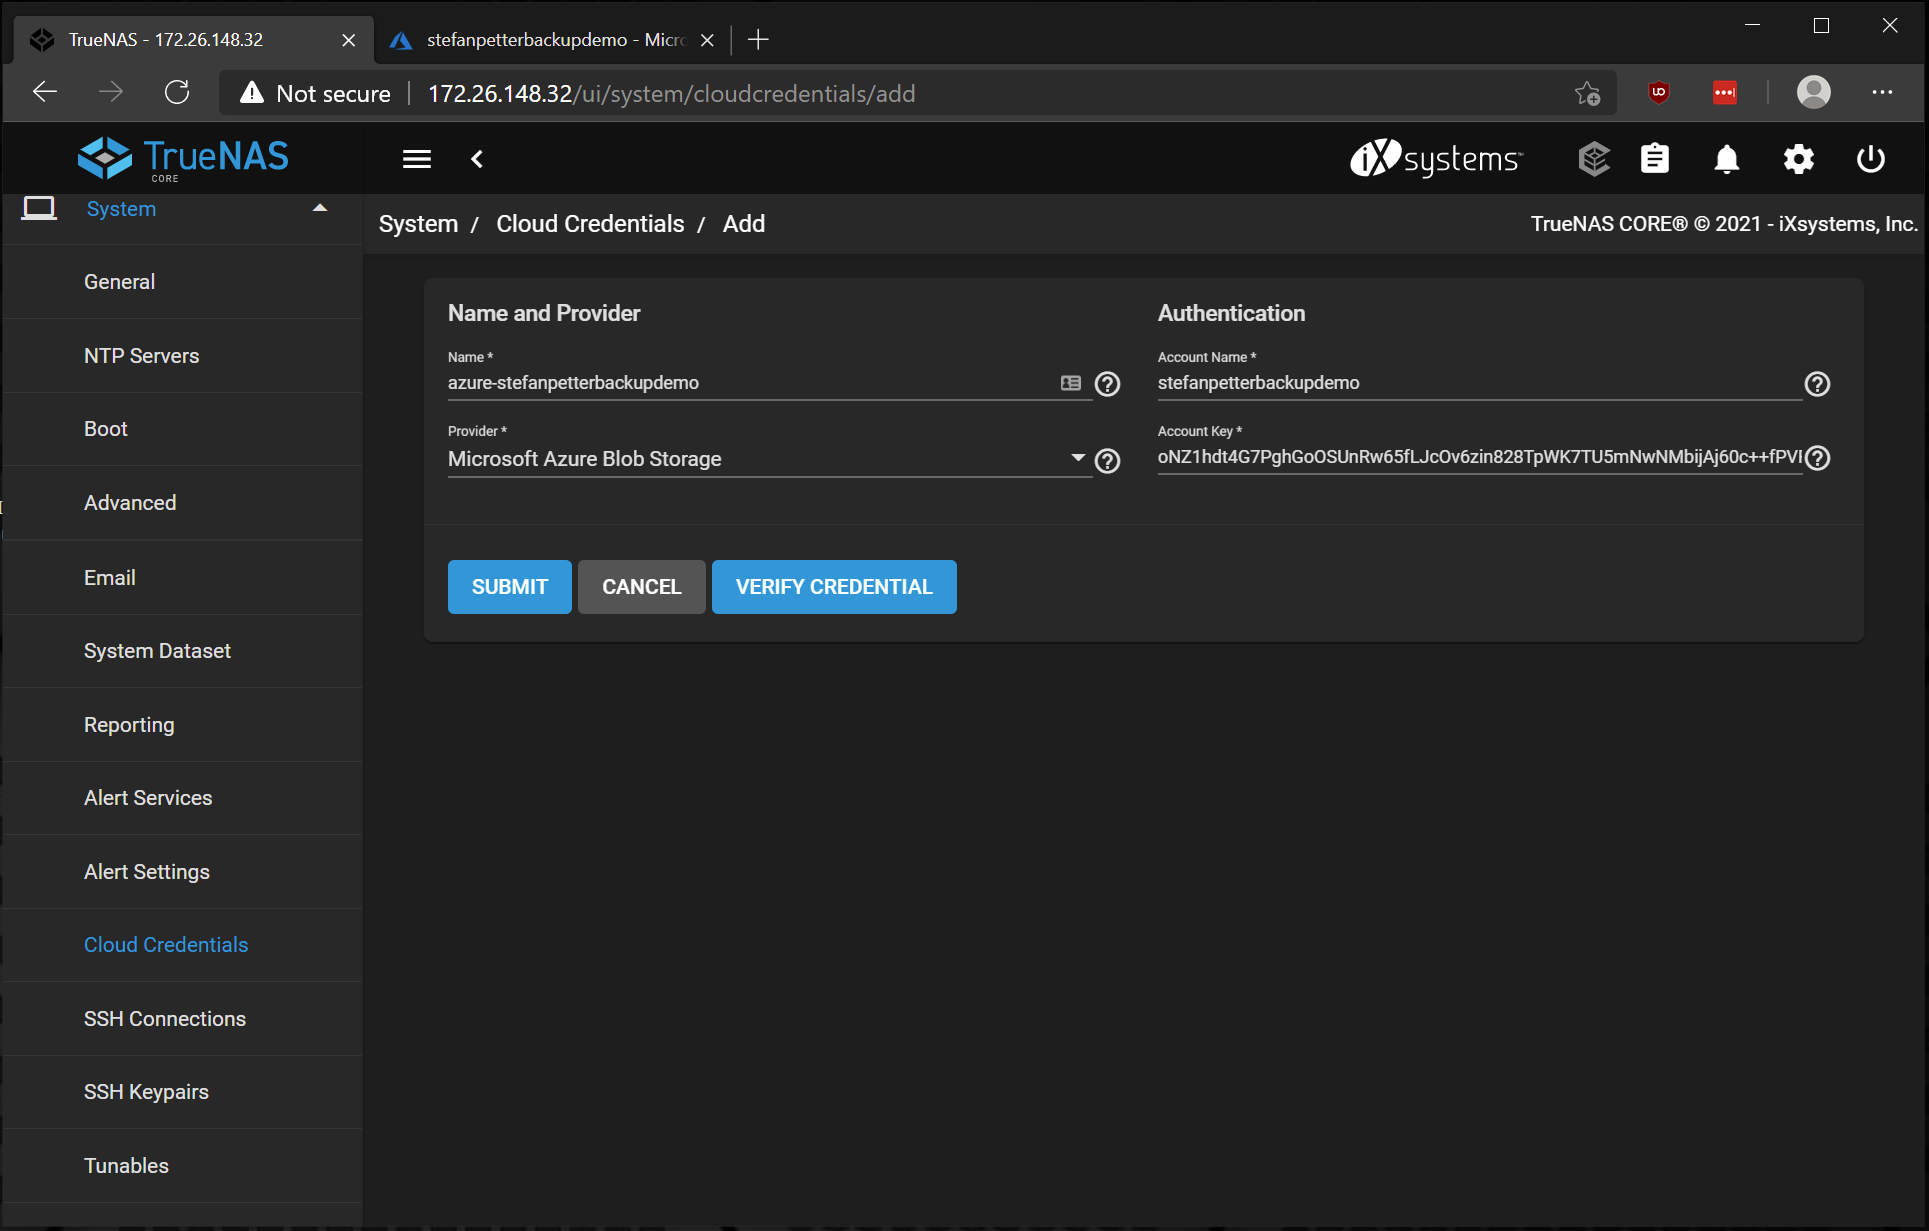
Now it’s time to add the storage account credentials to TrueNAS. In TrueNAS, go to System > Cloud credentials. Provide a name for the credentials. The Account name will be the name of your Storage Account. The Account Key is the storage account key. If everything is working properly, clicking the “Verify Credential” buttun will show a pop-up with the message: “The Credential is valid.”
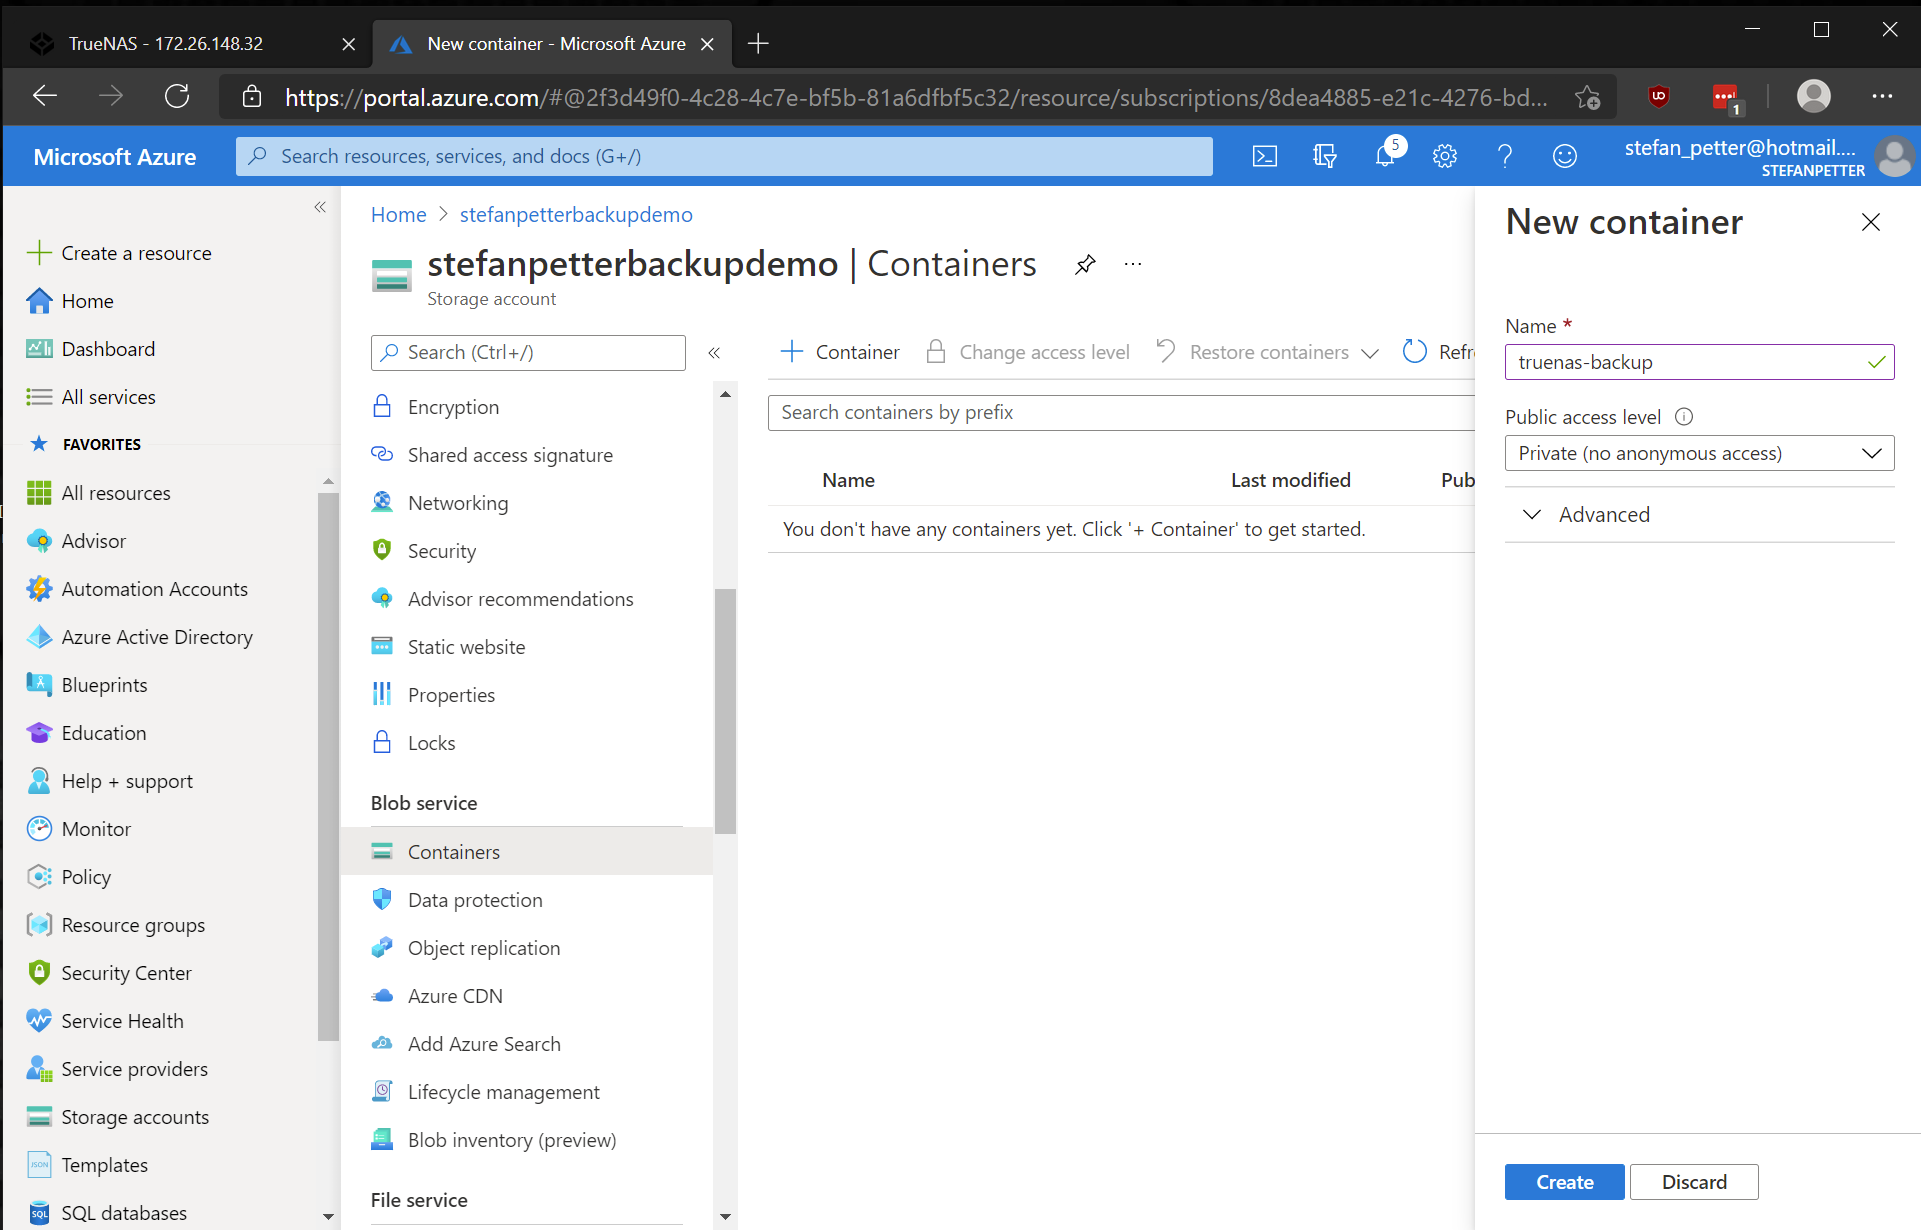
After successfully adding the credentials, we need to add a container in the storage account. Click on the “Containers” tab and the “+ Container” button. Make up a name for your container and select the “Private” access level.
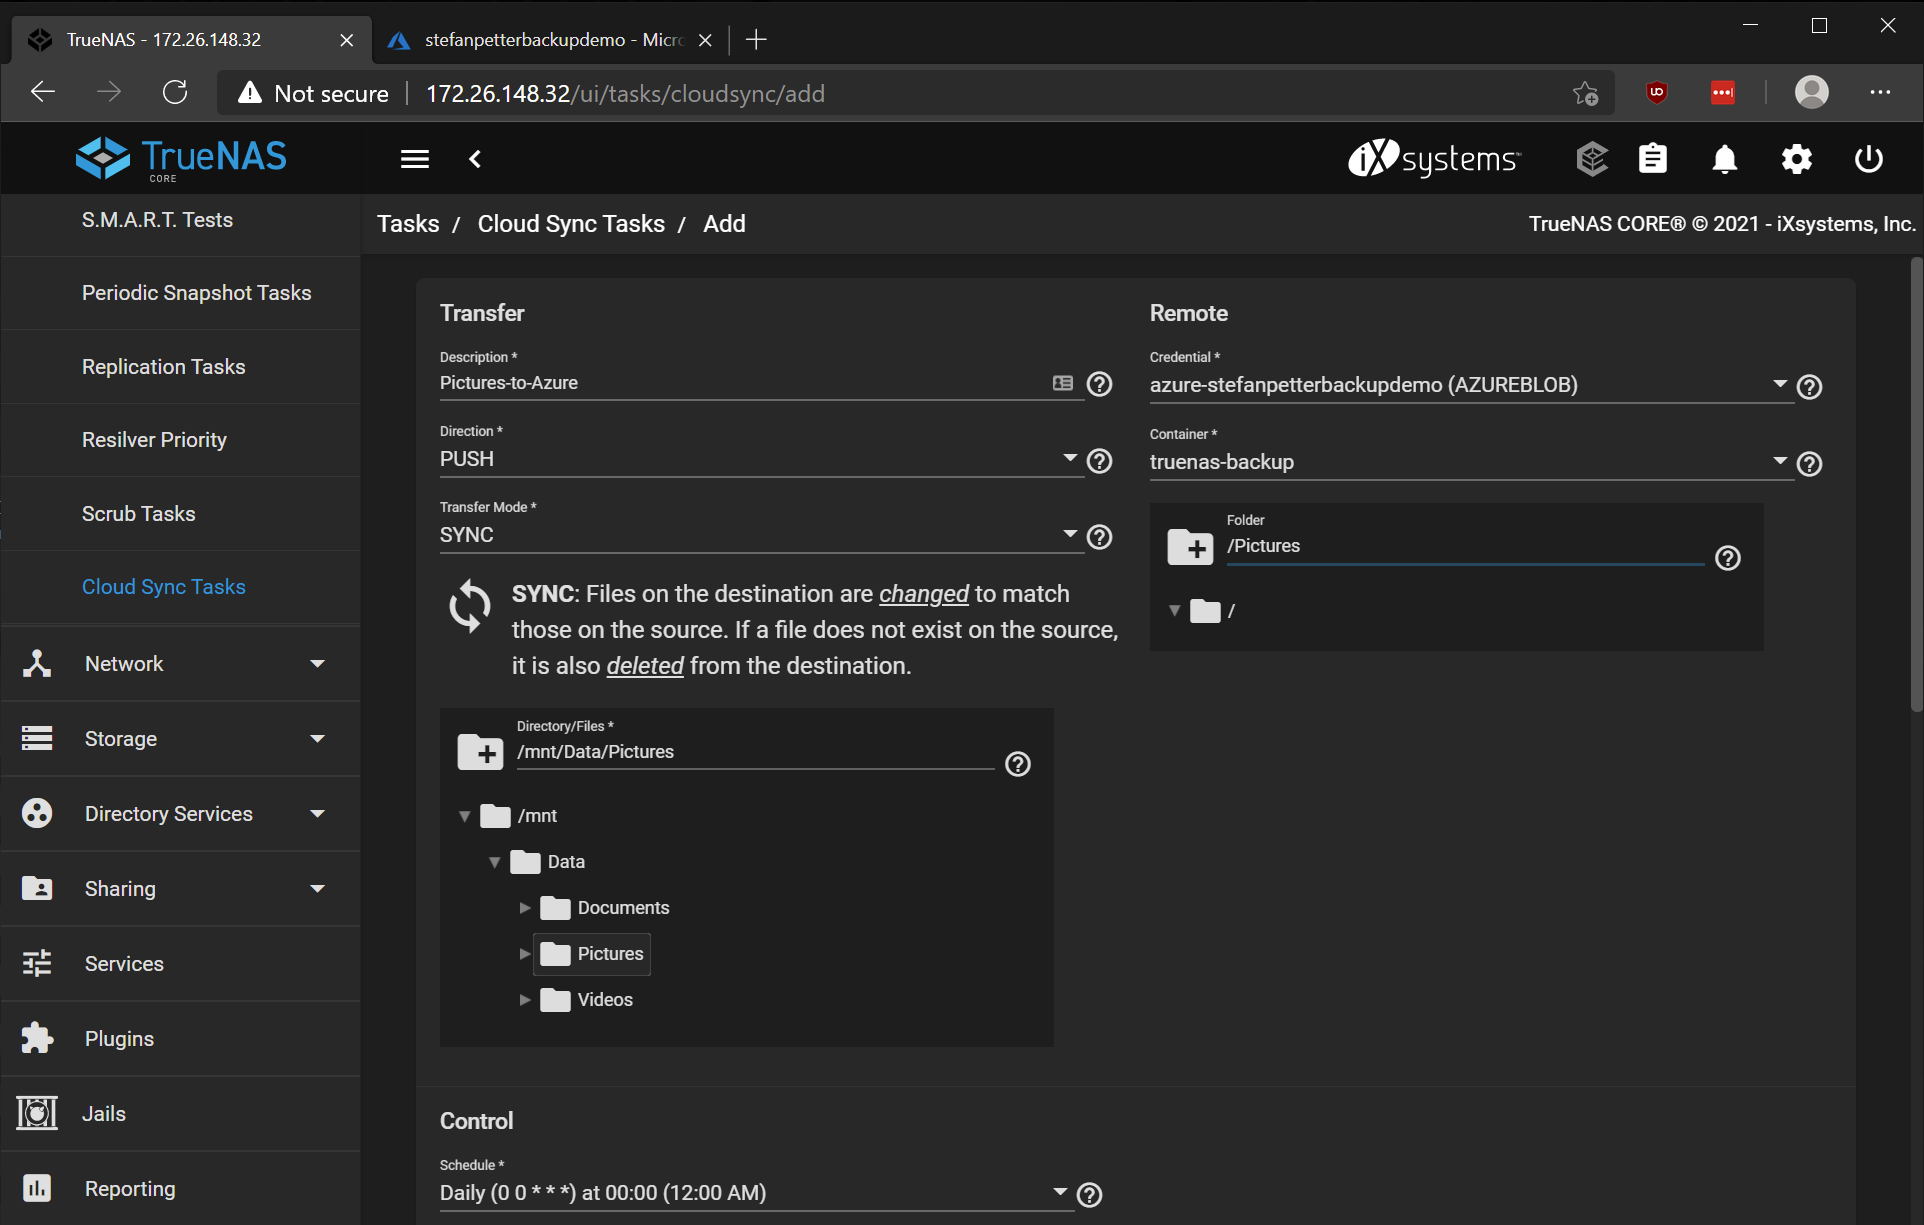
Now for the final step, in TrueNAS, go to Tasks > Cloud Sync Tasks and click “Add”. My personal preferece is to add multiple cloud sync tasks for different data types. This way you’ll have more control over the schedule frequency. The screenshot shows a Cloud Sync Task for pictures. The description is for you to choose. The direction for the task is PUSH. We want to send/push our data from TrueNAS to Azure. For transfer mode I chose SYNC. Other options are COPY and MOVE;
- Sync will match the data from TrueNAS to Azure. Deleted files in TrueNAS will also be deleted in Azure
- Copy will copy the data to Azure. Keeping everything in Azure ‘til the end of time.
- Move will move the data to Azure and delete it from TrueNAS
The Cloud Sync task will run once every night 12:00 AM. In the Credential field, select your newly added credential from the previous step. In the container field, Select the container we created in the previous step. In the Folder pane, Type in a new folder name for your cloud sync task. I chose “Pictures”. There are other settings in this pane, but you can leave them default for now. Press submit. You’ll return to the overview.
To test the cloud sync task you can select “Dry run”. To immediately start the sync, you can select “Run now”. The first sync can take up a long time. Time will depend on the amount of data in your dataset and your upload speed. After a successful sync, the status will show “Success”
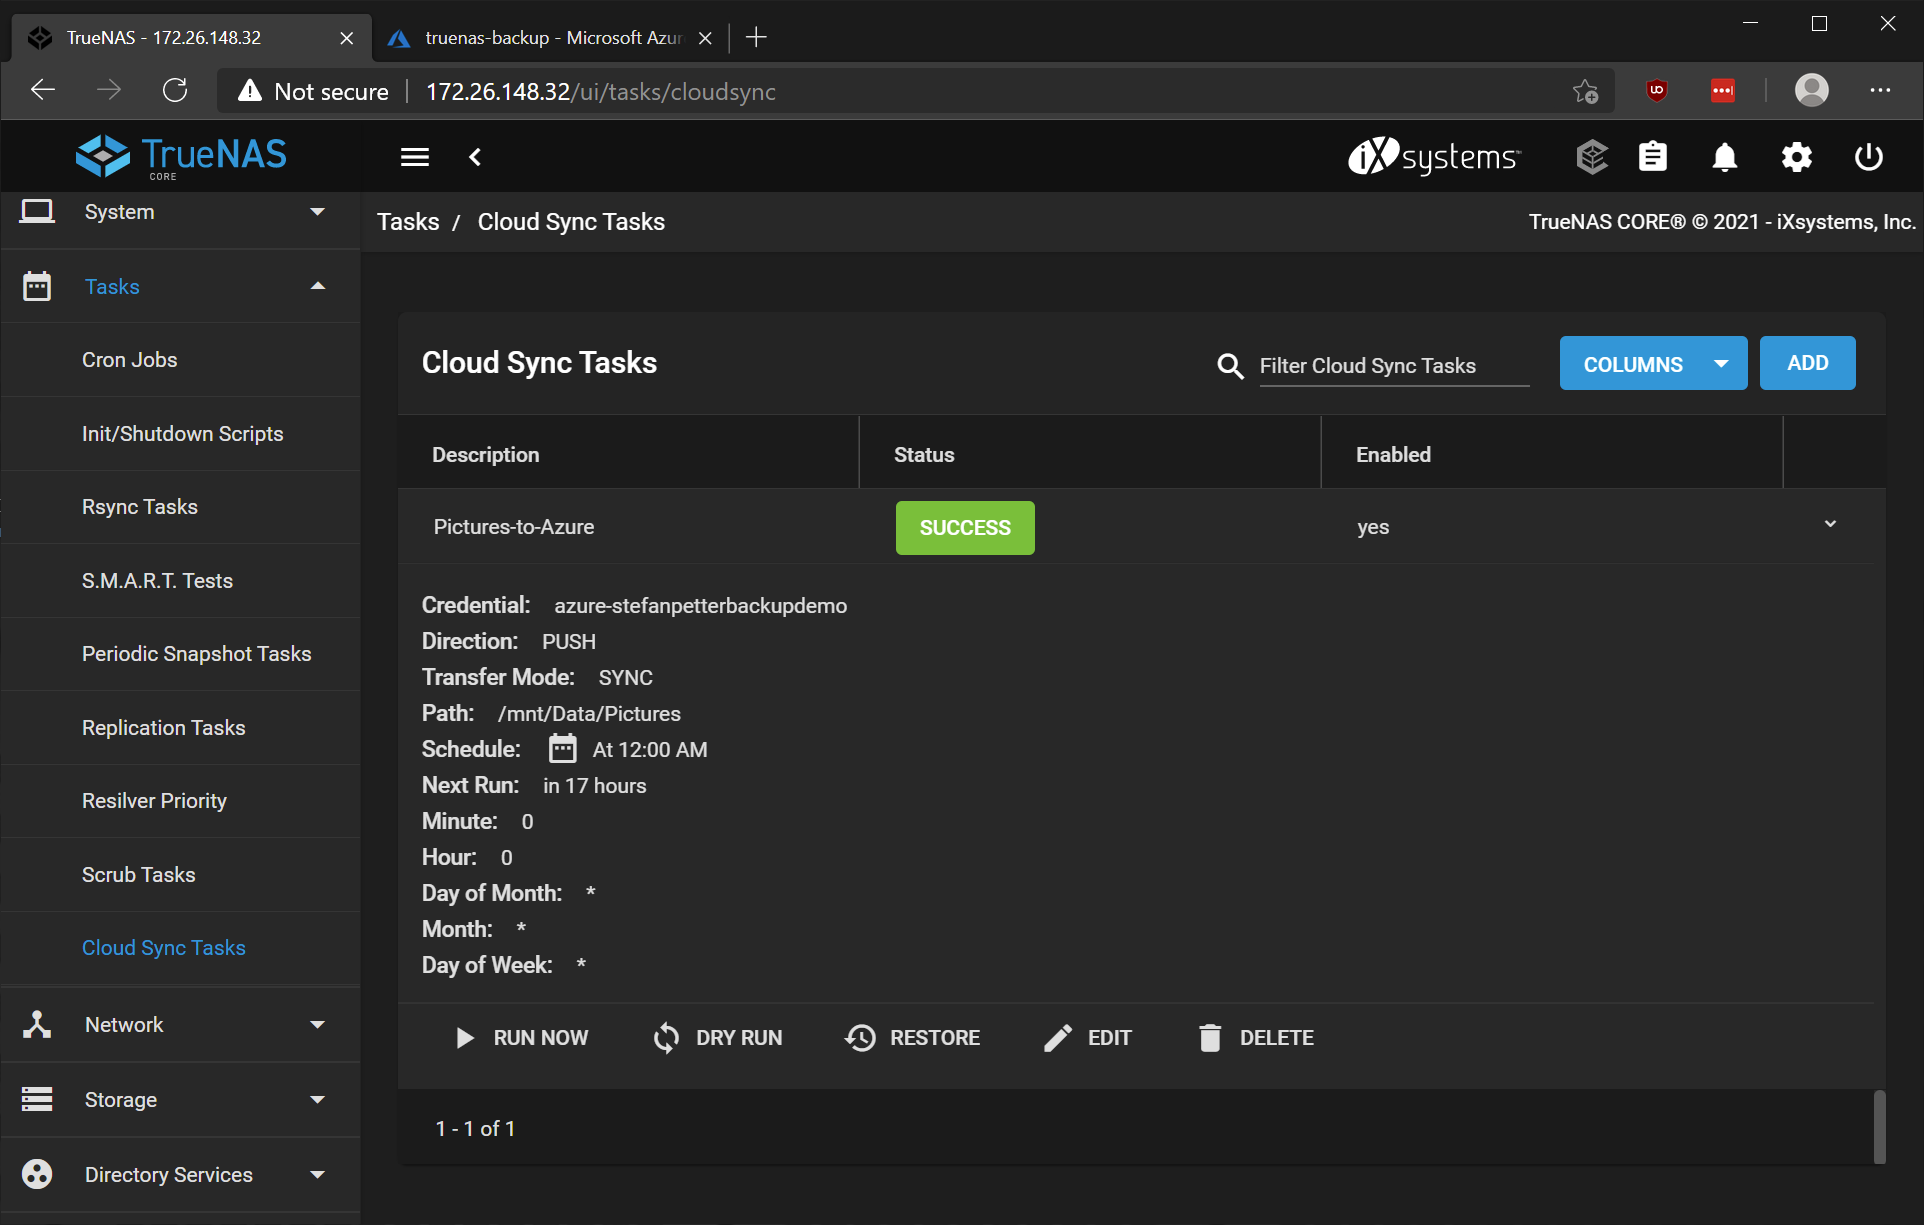
And that’s it! You’ve successfully created a cloud sync between your NAS and Azure. Thank you for reading! Feel free to contact me on Twitter if you have any quesions :)